Silhouette Challenges #33

Hello lovely ladies and gents.

I recently discovered a new challenge blog  (well to me its new anyway) and guess what its only for Silhouette users yippee !!!! So whats it called then….

blogbutton.png

Silhouette Challenges

Double yippee as its anything goes and as I make mainly cards using my Cameo this is just perfect for me.

IMG_5654.jpg

I used a cut file from the silhouette Studio and black card to cut the image, that was the easy part, I then removed the compound path ( Silhouette users will know what am talking about lol ) and added colour in between the black lines using the advanced colour settings. It was printed onto acetate along with the sentiment then the black frame was layered on top, popped up on foam and then added to a white card base.

I love the finished result and it looks much better in real life honest,its always a challenge trying to photograph acetate but I love the shadow effect you get if you pop it up with foam. I think you may just be able to see the shadow of the bird if you squint your eyes up and cross them a little, well that’s what I did anyway !

I’m so excited to find Silhouette Challenges and do hope you will pop on over and see all of the wonderful entries in the gallery so much inspiration.

Would also like to link this up to Less is More as my 2nd entry for their Silhouette challenge

LIM for blinkie

Also linking to Try it on Tuesday who also have the theme Silhouette and lots and lots of inspiration from the design team and in the gallery

Take care

Marie

Less is More ” Silhouette “

Hello lovely ladies and gents !

Popping in today with yet another shaker card, as I mentioned in my previous post I’m addicted to them at the moment so until it passes I’d like to share another with you all.

As many of you know I have another addiction one that I have had for several years . In this case though I don’t want to kick the habit , so I was especially pleased when I saw the new recipe was over at Less is More.

SILHOUETTE

I love my Silhouette machine and I love Silhouettes and Less is More being one of my favourite challenge blogs ……….

For any of you that don’t like creepy crawlies now is the time to look away.

YOU HAVE BEEN WARNED !

IMG_2678.jpg

A match made in heaven as far as I’m concerned.

So of course I used the silhouette  Cameo to make my silhouettes and print the sentiment ,adding acetate , patterned paper and sequins to make the shaker part. I cut another beetle from black cardstock and popped it up to give dimension .

Do pop over to Less is More as there are some amazing cards in the gallery and from the DT.

Wishing you all a wonderful Sunday

Take care

Marie

CASology ” Clear “

Hello lovely ladies !

Its time for a new challenge over at CASology and as you can see by my post title their cue card this time around is

Week 181 - Clear.jpg

So many possibilities for this one but I’ve gone with using transparency film and making a shaker card. Its not too much of a stretch to say that I’m fixated on making shaker and window cards and have been for the last few months.

IMG_5621.jpg

IMG_5622.jpg

I used and image and sentiment from the Silhouette store and cut the leaf using my Cameo, I added transparency film and then filled with sequins and seed beads and used some patterned paper to seal the deal !

Do pop over to CASology as once again the DT have pulled out all of the stops some amazing cards in the gallery jam packed with inspiration.

Take care

Marie

CAS-ual Fridays CFC146:Snowflakes

Hello lovely ladies

As I was having a little wander around blogland I noticed that one of my favourite challenge blogs  CAS-ual Fridays  and another new to me in the sense that I haven’t played along with them before , Inkspirational where having a similar challenge.

I simply couldn’t resist taking part especially as both Design Team galleries where jam packed with inspirational cards, not to mention all of the amazing entries.

11935090_1000404516650365_2011267611882424848_n-1

Inkspirational Word Prompt Challenge #97

IMG_2590

IMG_2593

To make my card I stamped this cute image from WPLUS9 onto some card and then imported the image into my Silhouette Cameo software so that I was able to manipulate the image , in this case making it larger. I then printed the image onto acetate to make a shaker card using one of my Spellbinder circles. The snowflakes are also curtesy of my Cameo and I just  love the effect of all of those gorgeous white sequins peeping through.

I really enjoyed making this card apart from having a desk full of sequins , which for some reason managed to escape and find themselves in all manner of places, they’re  pesky little things and love to attach themselves to the most unusual surfaces, just ask Rosy my French bulldog !

Wishing you a a happy and creative weekend

Take care

Marie

Addicted to CAS Code Word DIMENSION

Hello lovely ladies

Just popping in quickly to take part in the celebrations over at ATCAS. Its their  three year birthday and as part of the original design team I wanted to wish them a big fat happy birthday.

Although many of the original members have moved on there are still some of the lovely ladies there plus of course the most amazing boss lady I ever had,  the fantabulous and funny Smiley Kylie.

So what is the code word for this forthnights challenge

ATCAS - code word dimension.jpg

 So there you have it , so many possibilities

IMG_2467.jpg

Of course I used my Cameo to make this card with the help of a little glossy accents and a tad of pop up foam between the layers hence giving the required dimension.

Do pop over and join in the celebrations at ATCAS but you had better be quick as the party is nearly over but you still have time and there are so many amazing prizes to be won.

Must dash it looks like Kylie has got her eye on that last cocktail sausage and I haven’t had a bite to eat all day !

Take care

Marie

Less is More ” Masculine “

Hello lovely ladies.

Its been four months since my last blog post and it was to take part in another Less is More challenge. This time round they have another fantastic theme and that is ” Masculine “

A few months ago I was asked to make a card for the lord mayor of our city  I used this image but with different wording and he loved it so I thought it was time to give it another outing and to dedicate it to the three most import men in my life

IMG_2548 my husband Teo and our two sons Alexis and Aris all three of them are ” out of this world “

My lovely silhouette Cameo is responsible for this card both the sentiment and cut files are curtesy of the Silhouette Store , I used my Spellbinders Card Creator dies for the bases.

Do pop over to Less is More to see the amazing inspirational cards by the design team and as always there are some fabulous entries.

Take care

Marie

Less is More Red, White and Blue

Hello lovely ladies !

Well I can’t remember the last time I took part in a challenge and can hardly remember how to blog but I’ve been forced out of semi retirement by the fantastic challenge over at Less is More whose theme for this week is Red, White and Blue.

IMG_2376

Now this may look a very simple card but the red, white and blue background was anything but to achieve. I used marbling paint to get the effect which basically means making a huge mess with paper ,water and a kind of gooey thickening agent, having said that it was huge fun and each piece is totally different and the whole process is very additive. Needless to say I have tons of marbled paper to play with.

I used a spellbinders heart and a couple of stick pins and raised the heart up with foam.

Do pop over to Less is More as there are some amazing entries and once again the DT has worked its magic.

Take care

Marie

Happy Birthday Sandie !

As you all know my blog posts have been few and far between over the past months but today a very special lady is celebrating her birthday and some lovely blogging friends have decided to throw her a surprise linky party.

Sandie and I where team mates at ATCAS for quite a long time , she is one fun loving and talented lady and I wouldn’t miss her birthday for anything so..

A HUGE happy birthday from me wishing you a fabulous day surrounded by friends and loved ones .

A simple card made with my Cameo and papermania Kraft card Ive added some pretty DP underneath and some foam squares to give a little dimension. Hope you like it Sanide

If you would like to join in the birthday celebrations you can pop over to the lovely Kylie’s blog ( I miss you Smiley ) and find out all of the details and see all of the amazing cards that people have made for our dear friend.

Wishing you all a fabulous weekend

Take care

Marie

Shadow Box Tutoriorial Using Silhouette Cameo

Hello lovely ladies !

Its been so long since I blogged so long I nearly forgot how to do it !! Not only that but I don’t know how to start except to say I have missed you all and apologize for not visiting.

For those of you that have followed me in the past a little update on my health, am finally without crutches yippee !!! am back to work a few days a week for a couple of hours at a time. Mr P has been amazing through it all and I have been spoilt rotten ( thoroughly deserved of course ) While I’ve been away I’ve been crafting for myself and I really enjoyed it I have to say . So much so I joined a few FB groups mainly about die cutting , as you all know I love my Cameo and was lucky enough to receive the Cricut Explore another electronic die cutting machine from my mum for Christmas so now its double trouble and double the mess.

Ok so why am I here ? well……….the lovely ladies on my FB groups have asked for a tutorial on how I make my shadow boxes , many asked for a video but I don’t have a camera of the video variety and I can just about manage my blog ! so here is my tutorial in picture form BE WARNED PHOTO HEAVY.

Before I continue I would just like to point out that I am no expert, this is the way I do it and I’m sure there is an easier way to do this so feel free to jump in and help out.

Ok here goes , what you will need

A picture frame ( I’m using a Ribba frame from Ikea 23 x23 cm )

An electronic cutting machine ( I’m using my Cameo , what a surprise ! )

Card stock of your choice I find 220gsm Canson to be adequate

Vellum at least 110 gsm

Led tea light or strip light mine are from ikea, I use the Ledberg strip light as you can stick it to the wall and you can make it as long or short as you like

Adhesive of your choice, I use my 3m ATG for this

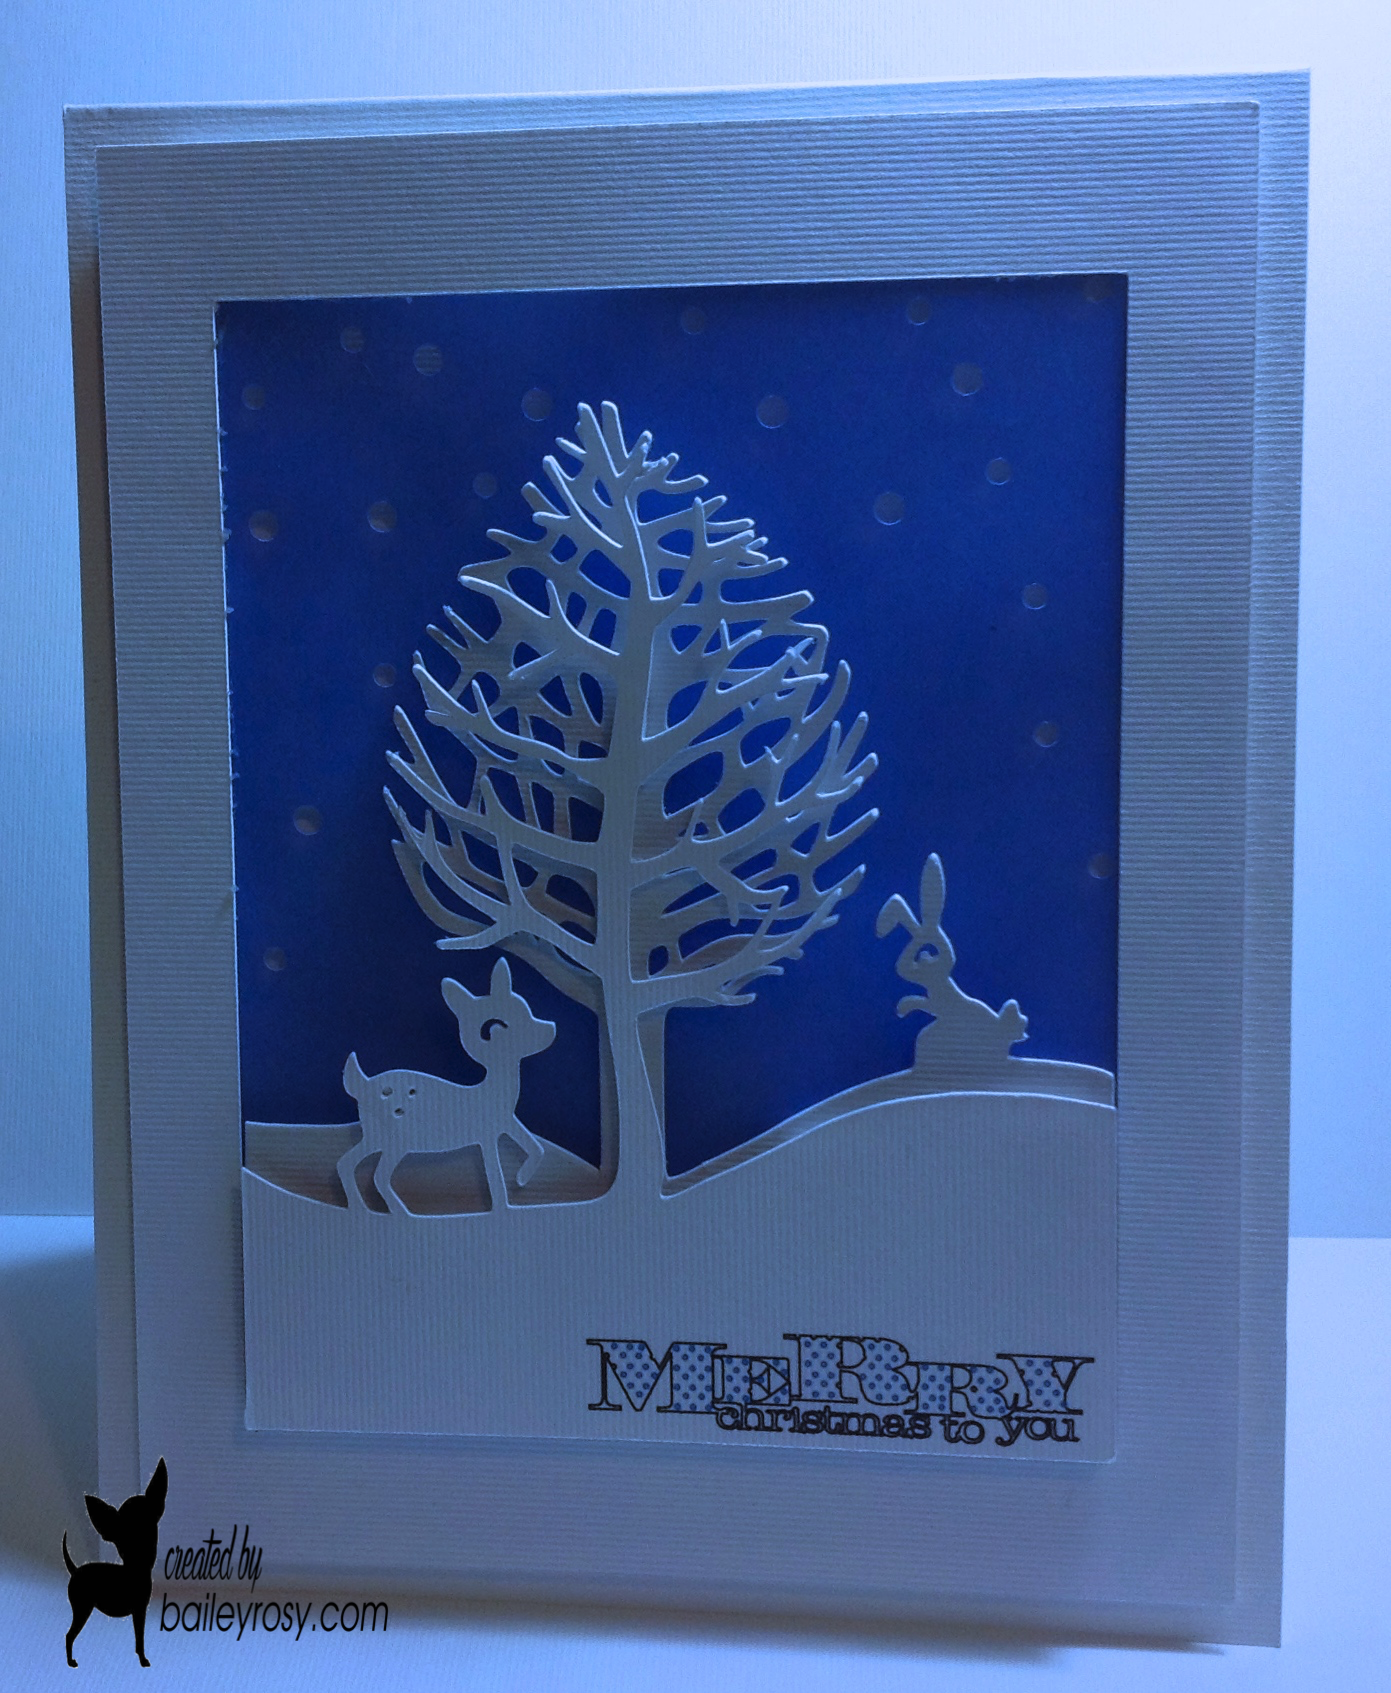
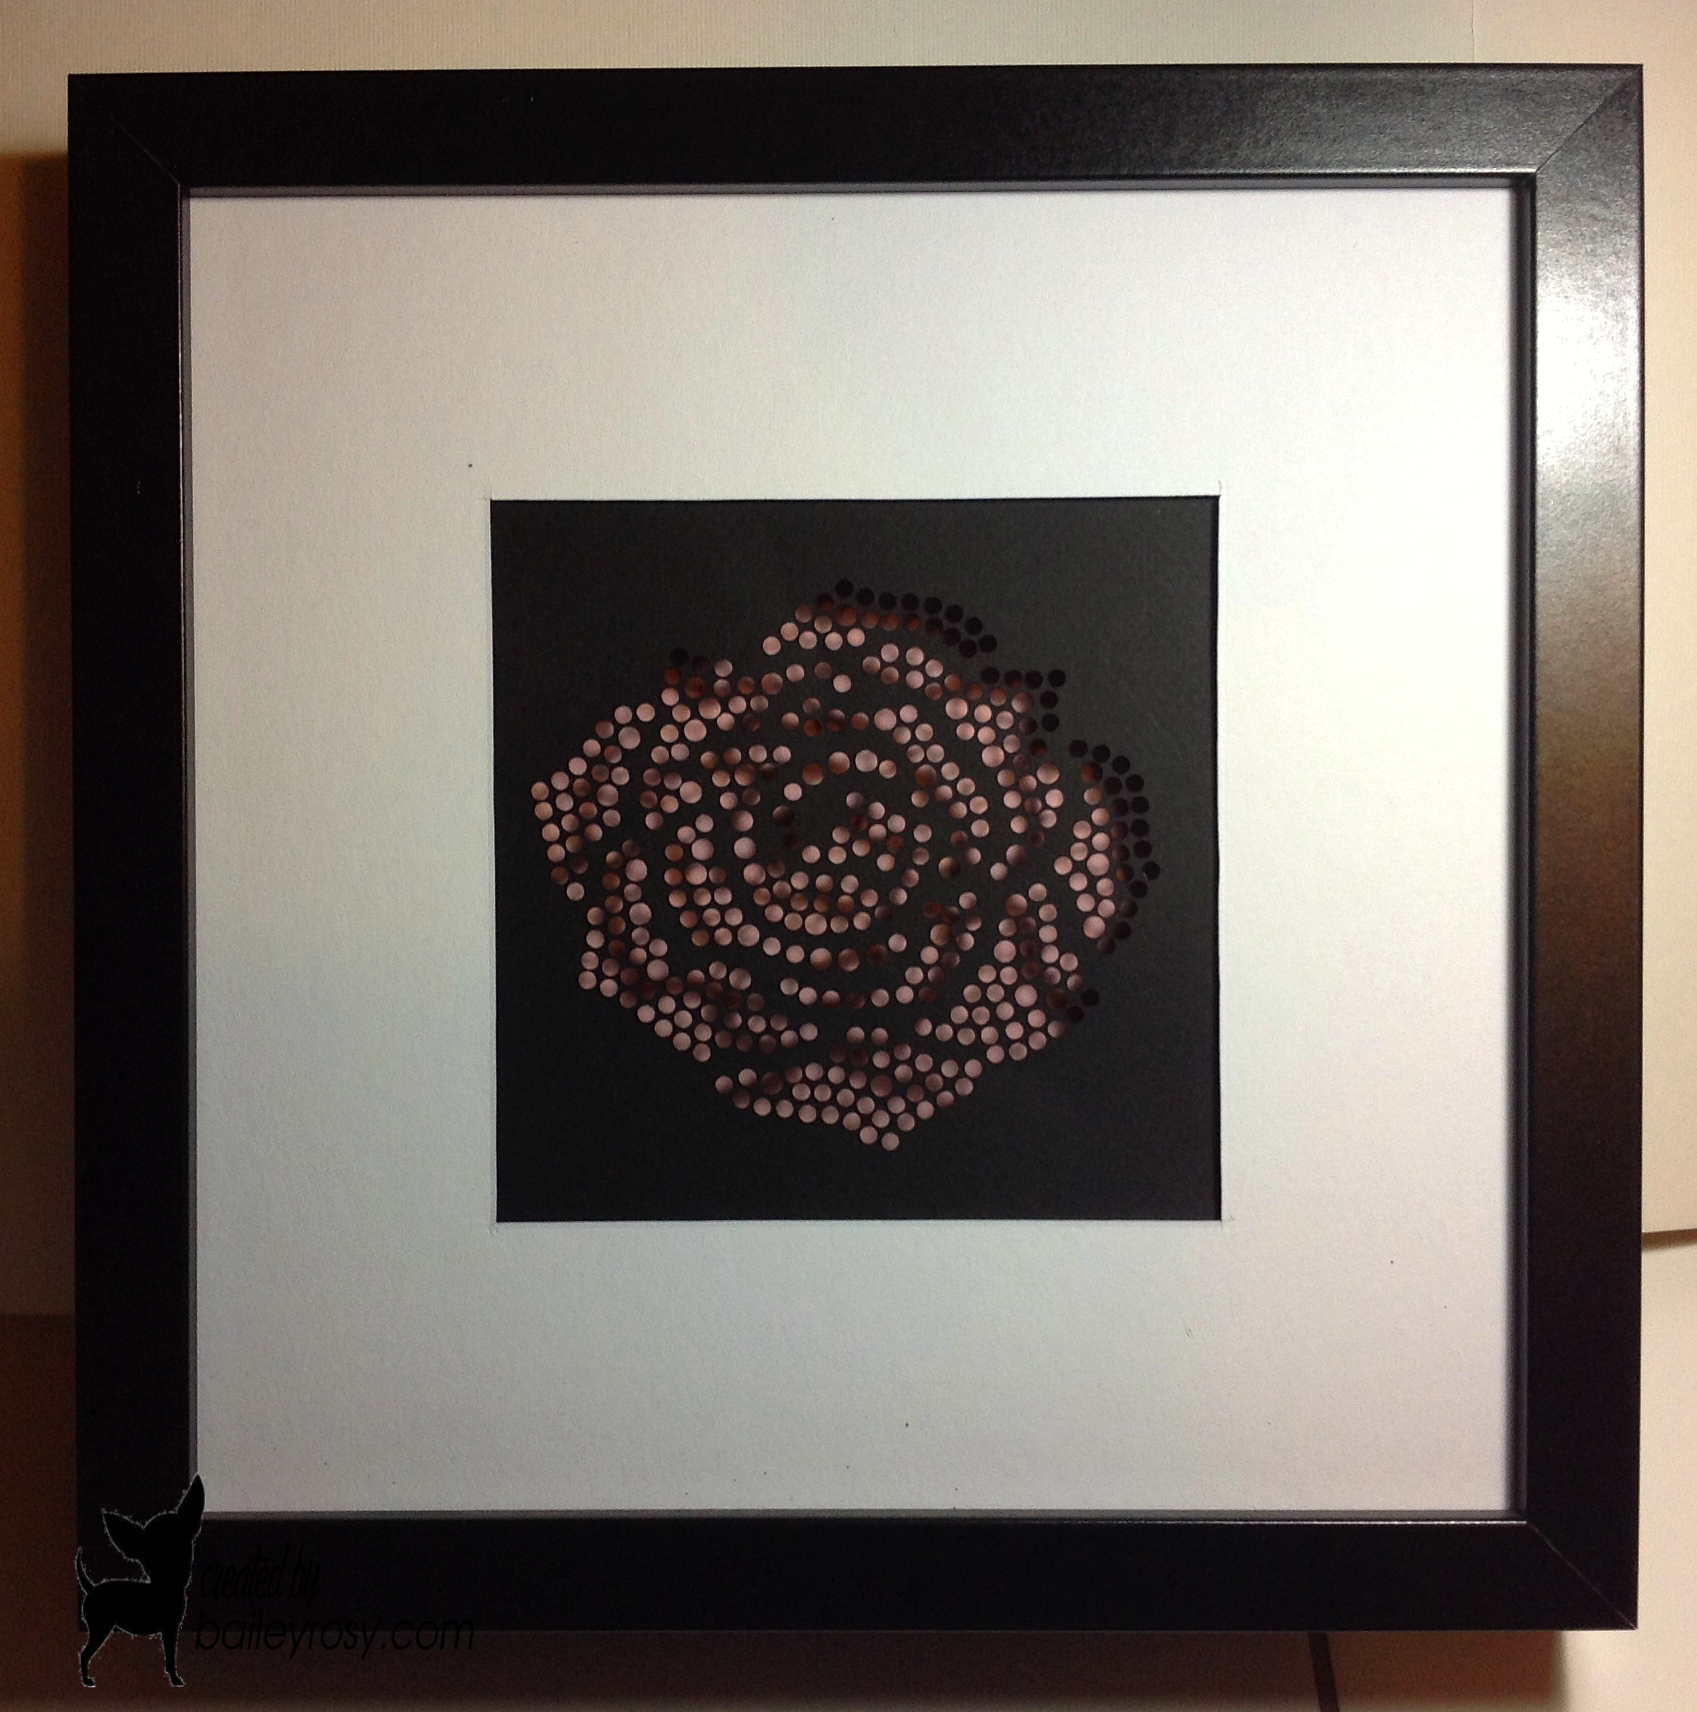
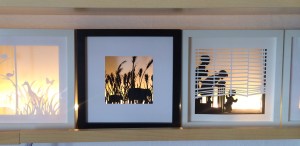
Here is the finished product so you don’t fall asleep or get bored in the middleIMG_5046

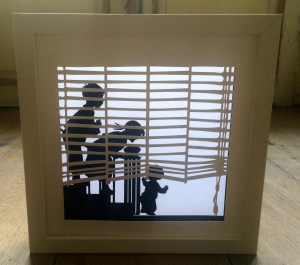
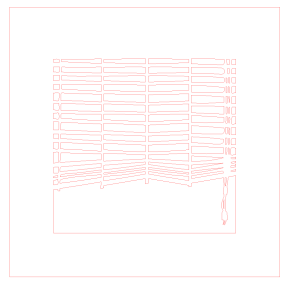
I’ve used two Silhouette studio files, firstly the blinds Design ID #19600 and the children Design ID #69877 both can be found on the silhouete store both of these designs are by Hero Arts.

This is what the Ribba frame looks like taken apart,  its shown here without the glass or back cover.

IMG_5039

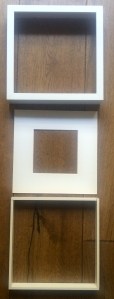
The square paper frame insert is not used in this particular shadow box so go ahead and put it to one side .

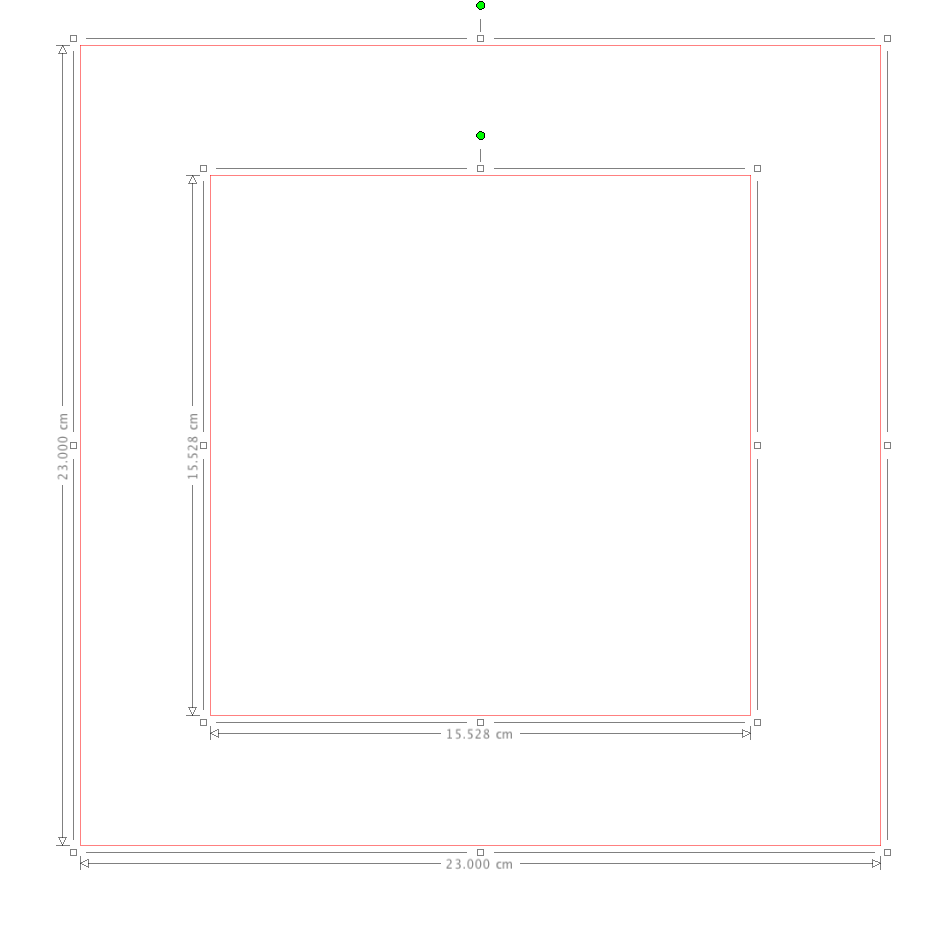
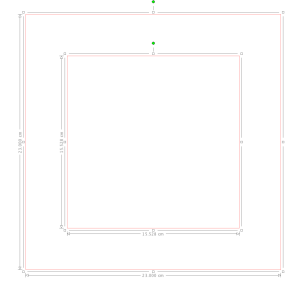
In the Silhouette software I make a square 23 x23 cm and offset it to the desired size depending on how much or how little I want the central design to show . In order to weld the images we have to make a compound path otherwise when we press the weld button everything disapears . Thanks to you tube I was able to figure this out many moons ago as this kept on happening to me, thank goodness for you tube ! So for those of you that dont know how to make a compound path just select the inner square making sure that is in the centre of the larger square , you can use your align tool for this , then hold down the shift key and select the outer square both will become highlighted next select make compound path.

Screen Shot 2015-04-23 at 1.42.25 PM

Ok so now we are ready to insert our first design in this case the blind

Screen Shot 2015-04-23 at 1.43.45 PM

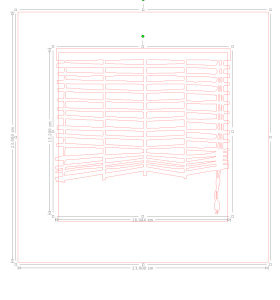
Make sure that the edges of the blind overlap slightly the inner frame otherwie they wont weld, select the weld button and you should end up with the picture below, hit the cut button and you’re good to go. I use speed 7 or 8 pressure 33 and speed 4 for this weight cardtock oh and I have to double cut too.

Screen Shot 2015-04-23 at 1.44.15 PM

Were ready to make the second frame using the same procedure as for the first above just make sure that your images for the blind and the children are of a similar size internally so that they line up nicely in the frame.

Screen Shot 2015-04-23 at 1.49.03 PM

Last but not least I cut a piece of vellum to fit the back of my frame which is 25 x 25 cm.

On to assembly

IMG_5041

Here I have inserted the blind with the good side facing outwards and on top of that the wooden picture mount that comes with the frame its the third item in my second photo this gives depth to the images.

IMG_5042

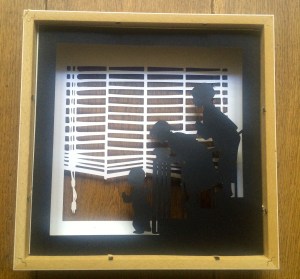
The children are placed on top of the photo mount and then secured with the metal clips inside the frame.

IMG_5044

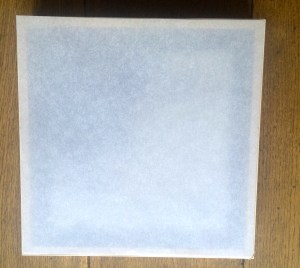
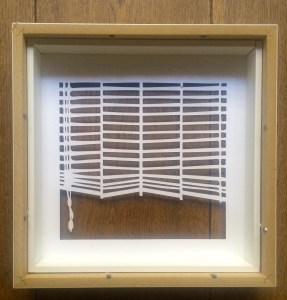
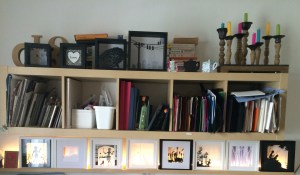
This is what it looks like with the vellum attached to the back, I use my atg gun to do this it sticks pretty well but can be removed easily it I want to change the inside. Just to point out that mine are sitting on a narrow shelf in my craft room they are not hanging because I like to have them lit by Led lights . If you want to hang them you can place the vellum directly on top of the last image and then close with the metal clips that way you are able to hang them

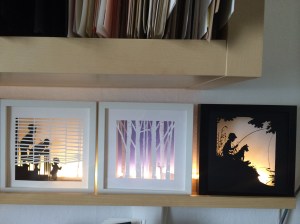
This is what they look like lit up

IMG_5066

IMG_5067

IMG_5072

I was overwhelmed by the response to these boxes on FB and for all of your lovely comments and questions. I do hope this goes in some way to answering all of your questions but please feel free to leave comments and ask away. Please bare with me on replying as I am sharing these on three FB groups as it takes a little time getting back to you all.

Wishing you all well

Take care

Marie

Addicted to CAS #53 Dots and Goodbye

Hello lovely ladies and welcome to a new challenge at ATCAS.

We have a fantastic new code word for you this time chosen by the one and only Loll the lovely ! So what has this gorgeous and talented lady chosen .

ATCAS - code word dotsLoll I loved your code word !

atcas dots

Cameo from head to toe, sorry about the poor light but I think it makes it look quite atmospheric lol !

atcas dots-3

This is a rhinestone pattern but I chose to frame it instead,  made by my lovely Cameo of course.

We would love for you to join us at ATCAS the design team have come up with some amazing cards to inspire you all and of course we still have the very talented Linda with us as guest designer.

We are also sponsored by Inspired by stamping who are offering a most generous $20 gift voucher woo hoo !

logo

`This unfortunately will be my last post as DT member at ATCAS due to ill health I’m unable to give of my best and feel it is time for me to step down. I’ve had an amazing two years and can’t thank Smiley Kylie for the wonderful opportunity. Not only is she an amazing boss but a wonderful friend. Also a big thank you to the rest of the team who have put up with me during my difficult time and for their support and love. Also a big thank you to my followers who have cheered me up no end with their positive words and wonderful cards.

Here are a few pictures of where I have been hiding for the last five weeks

IMG_4831

This is a decompression chamber , looks a bit like a submarine doesn’t it that or the tube !

IMG_4846

Here is me and the gang( I’m on the left ) and no I’m not the one with the moustache !

I have to visit the hospital every day for six weeks which is why I have found it difficult catching up with you all. I have met some amazing people and made some great friends we have laughed and cried together, mainly laughed thank goodness , everyone is so supportive and that has made the whole process a lot easier,  I will miss them all when my treatment ends.

Hopefully I will be back blogging soon so until then

Take care

Marie